Technical Note: XTN1607
Overview
When installing antivirus (AV) protection on a XenData archive, it is important to choose an AV solution that has been certified. XenData6 Server software and AV software use file system filtering techniques and there may be undesirable interactions if you use an AV product that has not been certified.
ESET File Security version 6.4.12004.0 has been certified for use with XenData Archive Series software, version 6.21 on Windows Server 2012 R2.
This technical note describes how to configure ESET File Security and the XenData archive to provide effective antivirus protection.
Configuring ESET File Security
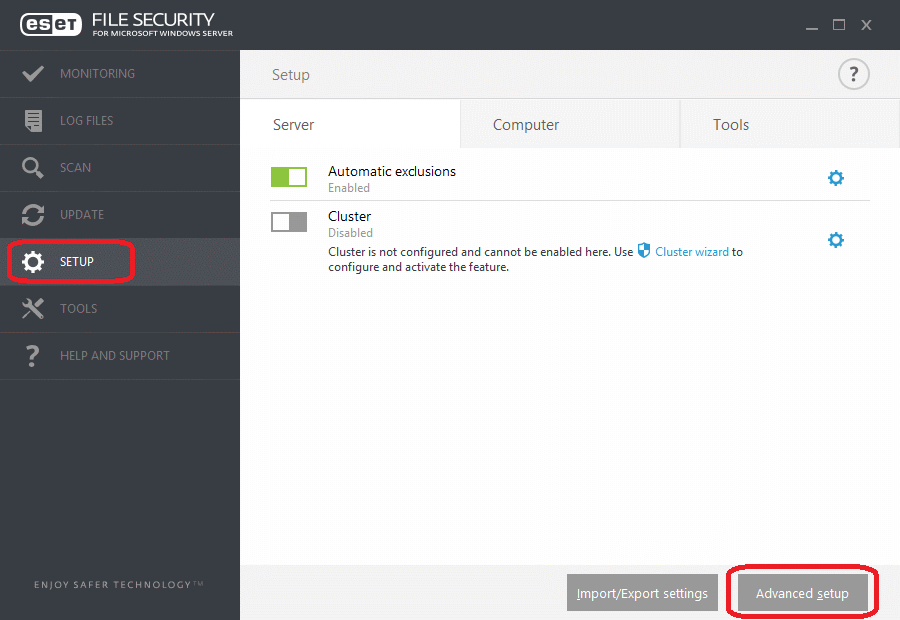
Note that manual or scheduled scans must not be performed on the logical drive under XenData control. However, they may be run on other volumes, such as the C: drive of the archive server. If ESET File Security scans the logical drive letter managed by XenData software, it will read all files on the archive causing a restore for each file that is held near-line. This is usually undesirable as it will greatly reduce the archive performance. To ensure system security without unnecessary performance impact, launch "ESET File Security" from the Start menu, then select "Setup", then click "Advanced Setup". In this example, the XenData Archive is located on drive X:; thus we will exclude the X:\ drive and all of its subfolders from within the Exclusions menu.
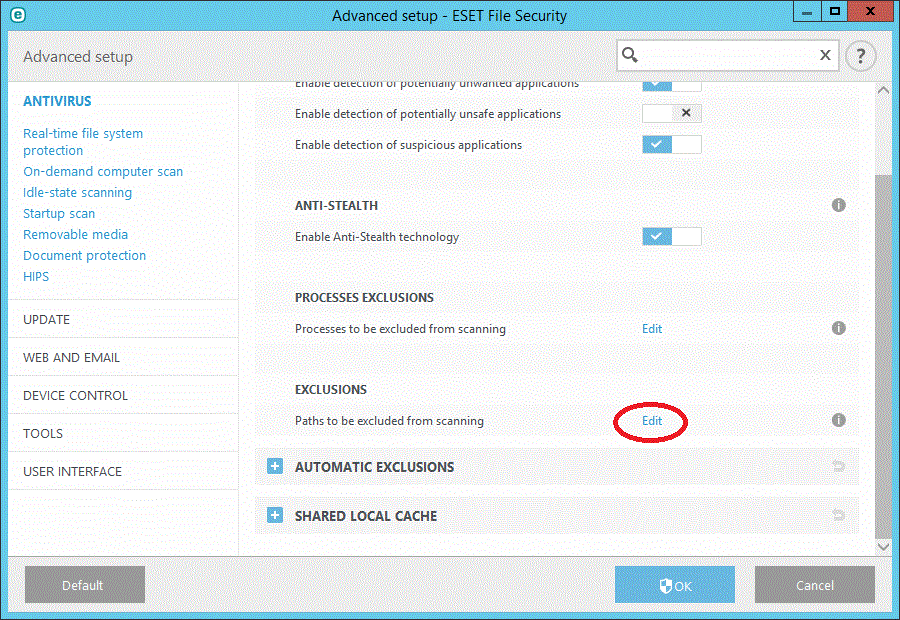
Click "Edit".
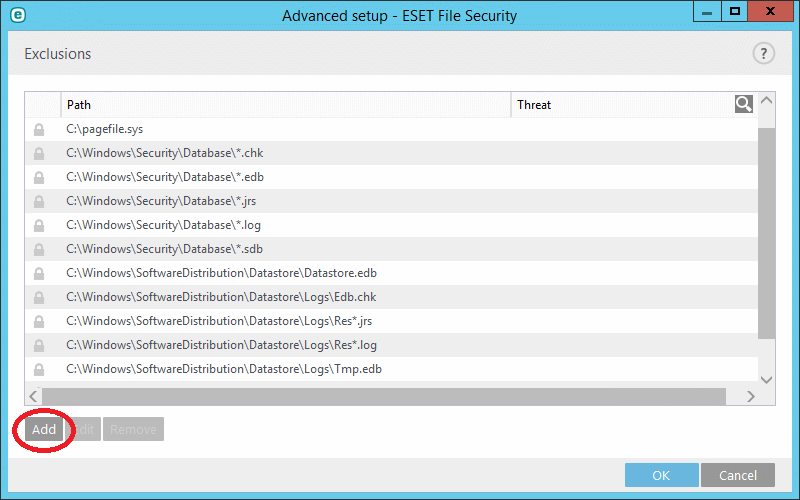
Click "Add".
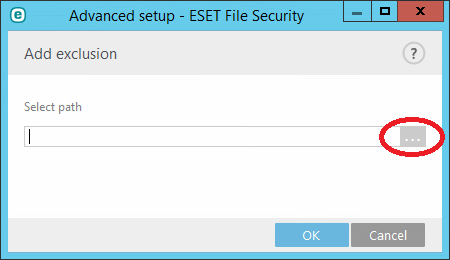
Click on the "…" to select the path to exclude.
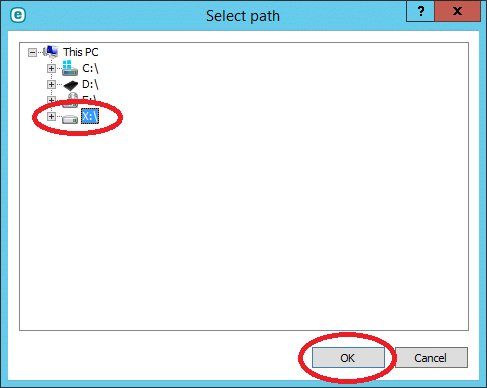
Select "X:\", then click OK.
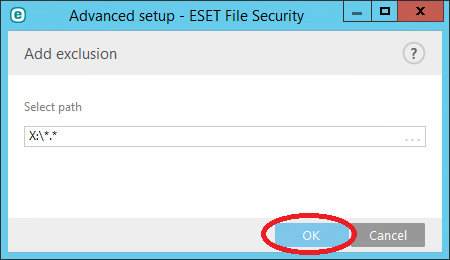
The "Advanced setup" screen should now show "X:\" in the "Select path" field. Click "OK".
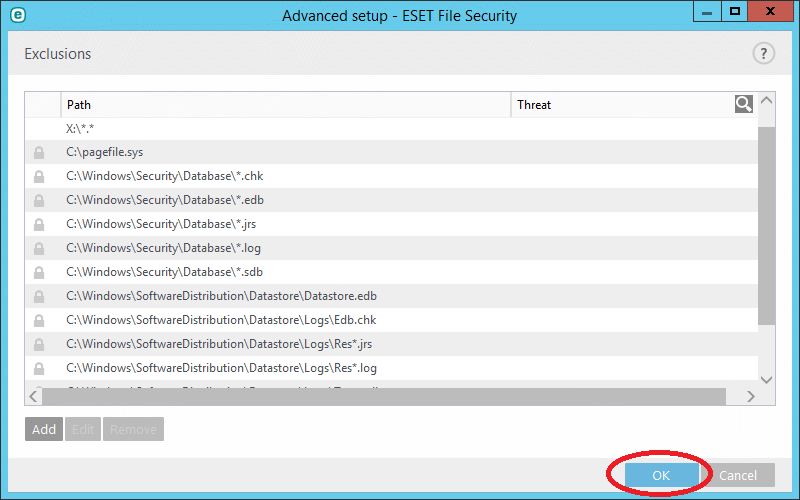
With "X:\" now in the Exclusions list, click "OK".
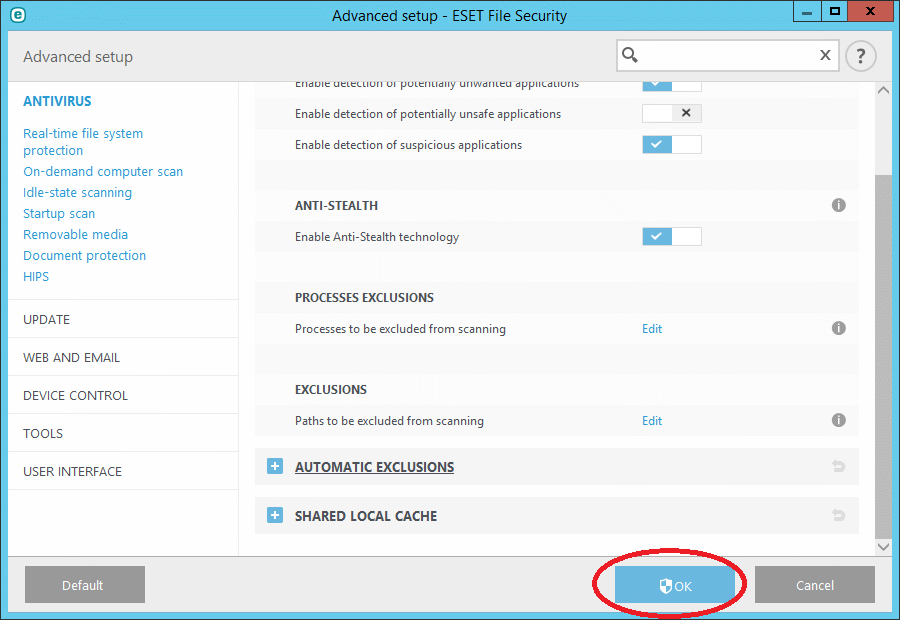
Click "OK" in the "Advanced setup" sceen.
To exclude the XenData Service, select "SETUP", then click "Advanced setup".
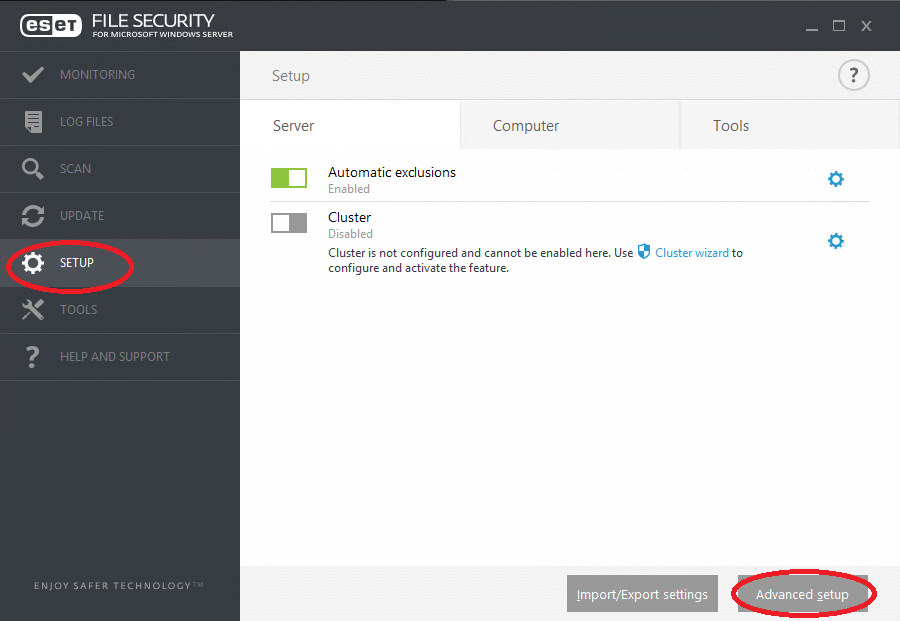
Scroll down to the "PROCESS EXCLUSIONS" section, then click "Edit".
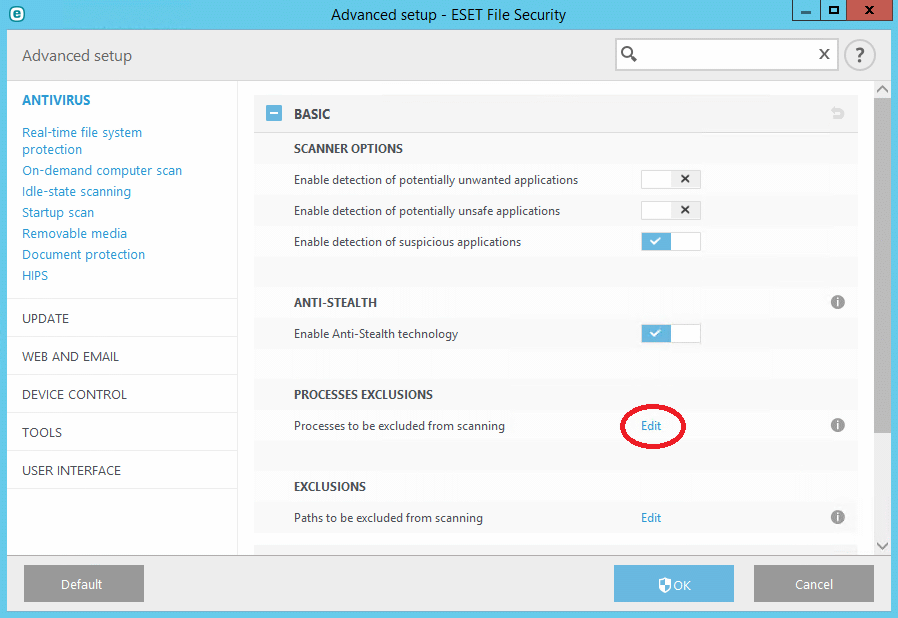
Click "Add".
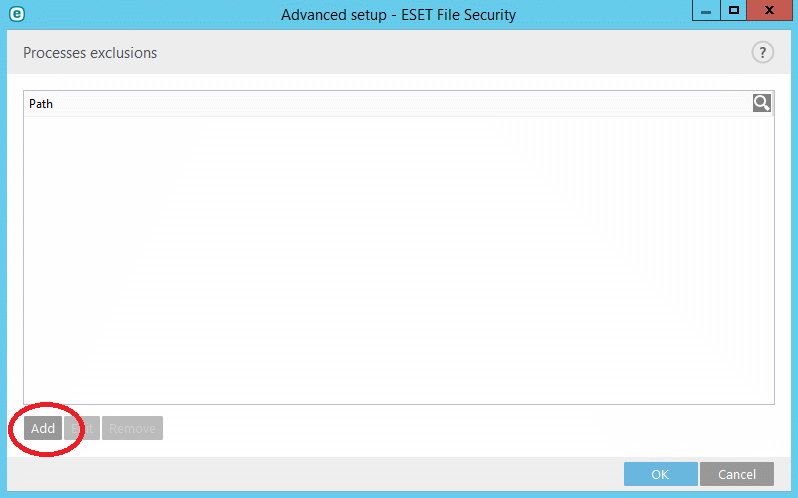
Click on the "…" to the right of the "Select process excecutable (*.exe)" field.
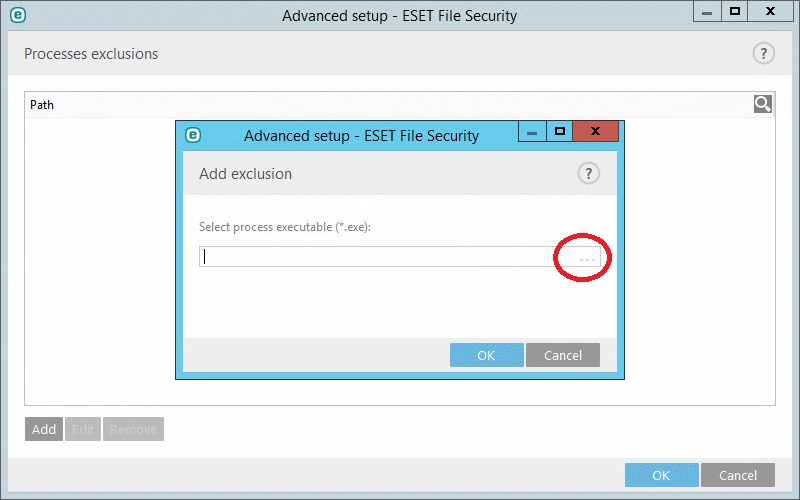
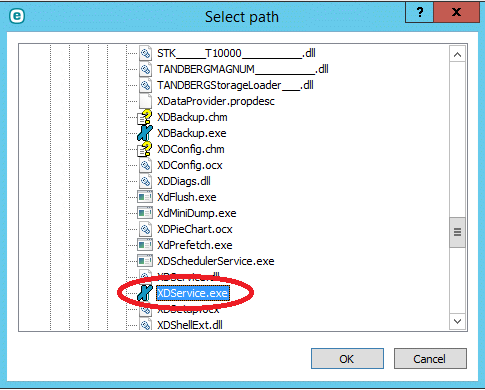
Scroll through the list of files and select "XDService.exe".
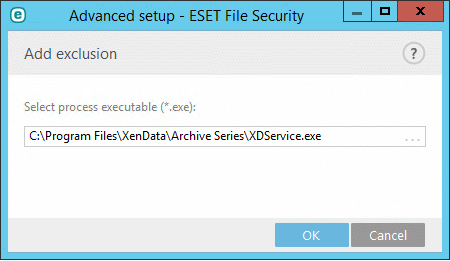
The field should now contain "C:\Program Files\XenData\Archive Series\XDService.exe". Click "OK".
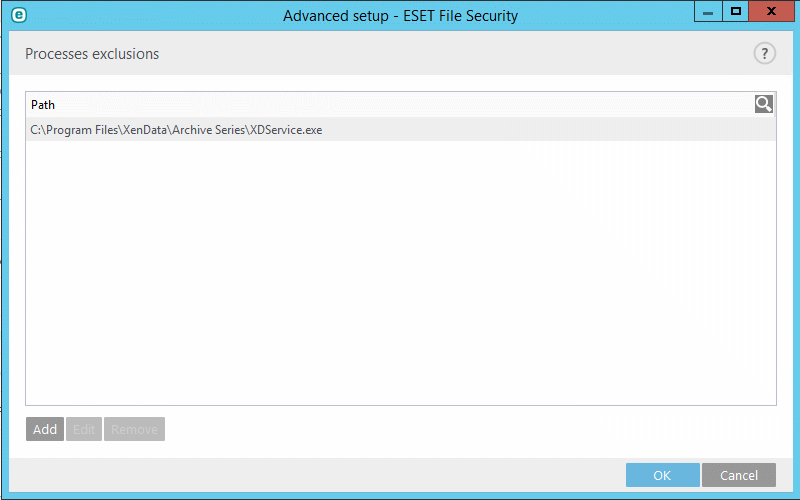
Click "OK".
Applicable Operating Systems
- Windows Server 2012 R2
Applicable XenData Software
This technical note is applicable to:
- Version 6 – Server Editions of Archive Series software


