- First connect the LTO drive to the X1 using a USB cable. You may use any of the USB ports at the rear of X1 unit. Then power on the LTO drive and wait until the green light on the front of the drive turns solid green and, only then, turn on the X1 by depressing the power button on the front of the unit. Then login to the X1.
LTO Drive Installation Instructions for USB Connected LTO-6 Drives
- Right click on the Start icon. Then scroll to and click on device manager.
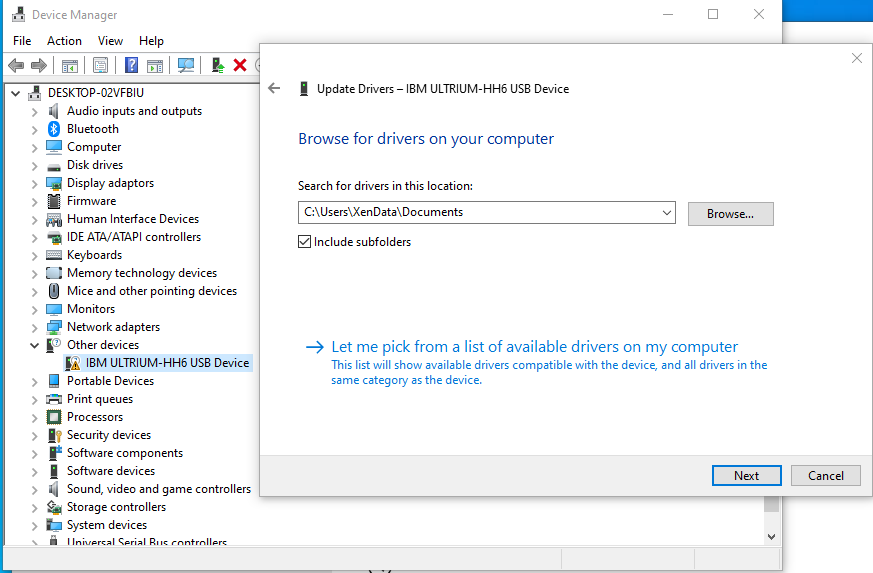
- After Device Manager launches, click to expand Other devices. There will be a device with a yellow warning triangle with the name of the LTO drive. Right click on it and select update driver then ‘browse my computer for driver software’.

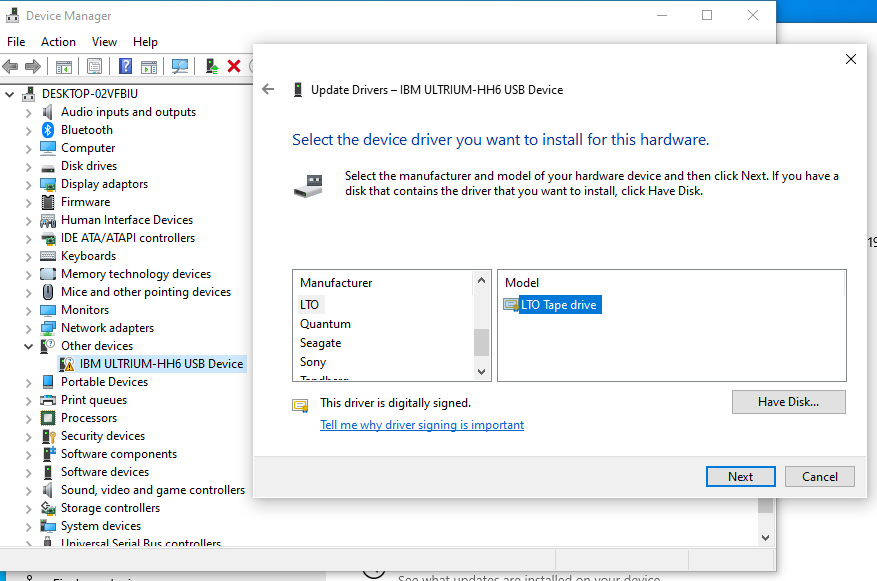
- Click on the ‘let me pick from a list of available drivers on my computer’ then scroll down to ‘Cassette drives’ then ‘LTO’ and click on it, a ‘LTO Tape Drive’ certificate should show up under model, click ‘Next’ , ‘Yes’ then ‘Close’

- Now in the device manager will show the LTO driver under Cassette Drives.
- A registry edit needs to be performed to increase the maximum block size that can be transferred over USB. You can download a file to the X1 from the following link that will perform the edit for you: https://xendata.com/downloads/Unitex/KB2581464_UNITEX_LT60_USB.reg
Save and run the file that is downloaded. Allow the file to make changes to your device and then click ‘Yes I am sure I would like to continue’. A pop up will then appear that confirms that the keys and values contained in the file have successfully been added to the registry.
- Finally, use the XenData hardware configuration utility to recognize the LTO drive as described in the X1 Installation and User Guide.


