Technical Note: XTN1802
Overview
When installing antivirus (AV) protection on a XenData system, it is important to choose an AV solution that has been certified. XenData Archive Series software and AV software use file system filtering techniques and there may be undesirable interactions if you use an AV product that has not been certified.
The Antivirus and Antispyware module of Symantec Endpoint Protection version 14.0 has been certified for use with the operating systems and XenData versions identified at the end of this technical note.
This technical note describes how to configure Endpoint Protection and the XenData software to provide effective antivirus protection.
Configuring XenData
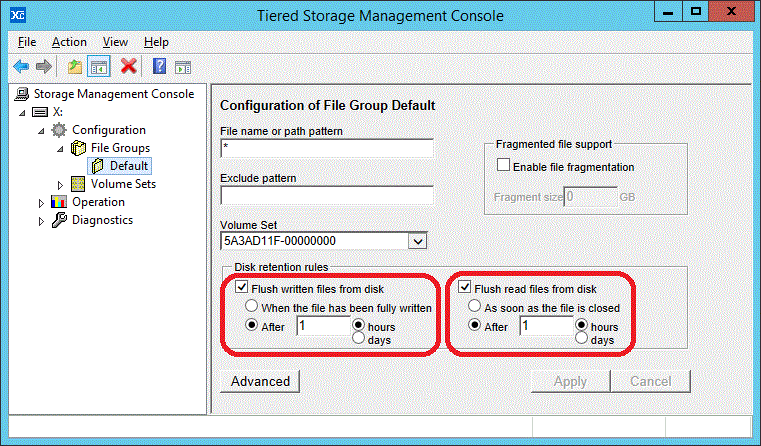
To prevent Symantec from restoring/reading files while they are being written to the XenData Cache, disk retention must be set to 1 hour, or greater. To do this, launch XenData Configuration Manager, and select the file group being used. Check the "Flush written files from disk", then click "After", and enter 1 in the field, and click on "hours". Repeat this for the "Flush read files from disk" item.
Configuring Endpoint Protection
When the “Enable File System Auto-protect” option is enabled, Endpoint provides continuous monitoring of all files that are archived and restored. This option is supported and recommended, but you will want to use the User-defined Exception option to exclude the XenData Managed Drive letter as shown below:
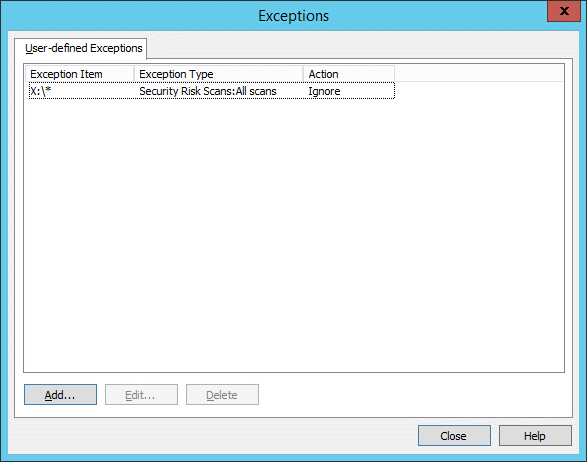
In this example, the XenData managed volume is drive X: and therefore we have excluded the X:\ drive from within the Centralized Exception menu. The full procedure may be found in the section below.
Detailed Instructions for creating a User-defined Exception within Symantec Endpoint Protection
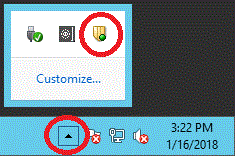
- Launch the Symantec Endpoint Protection program by clicking on the up arrow located at the lower-right corner of the desktop, then double click on the Symantec logo:
- Click on "Change Settings" located on the left side of the Window, then click on "Configure Settings…" located on the right side of the Window.
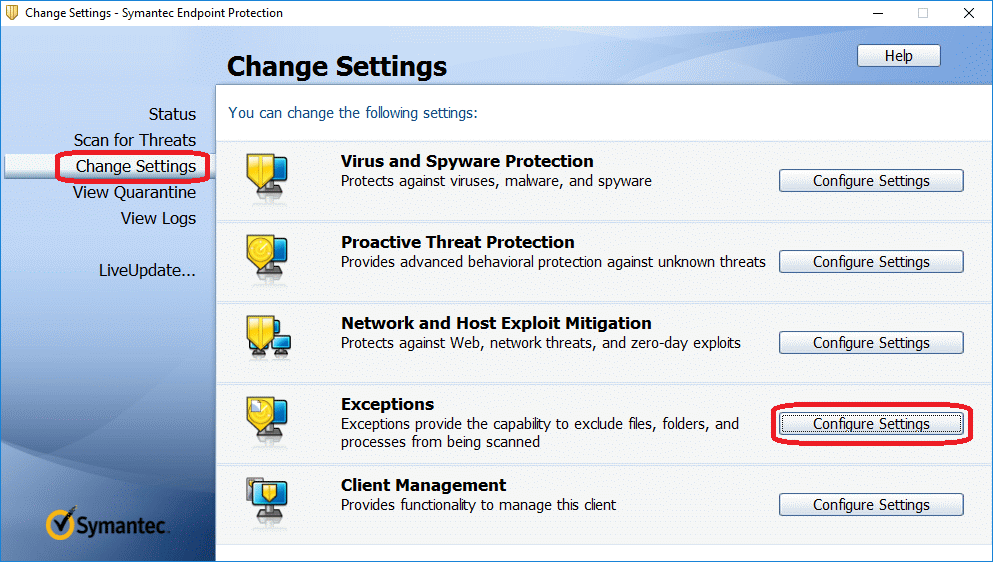
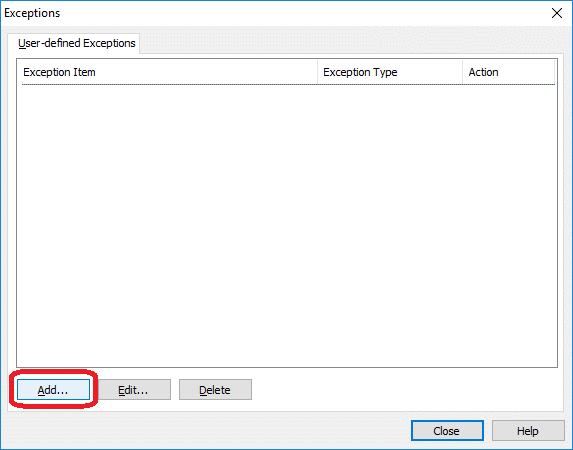
- In the Exceptions screen, click on the "Add…" button
- Click on "Security Risk Exception", then click on "Folder".

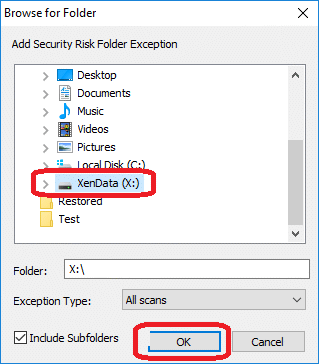
- Navigate to the "XenData (X:)" item and select it. Verify that "Include Subfolders" is checked, then click "OK"
- The item "X:\*" should now be shown in the "Exceptions" screen. Click "Close".

Applicable Operating Systems
- Windows Server 2012 R2
- Windows Server 2016
Applicable XenData Software
This technical note is applicable to:
- Version 6 – Server Editions of Archive Series software
- Version 7 – Server Editions of Archive Series software including the Cloud File Gateway


